Engineering
So, “Engineering” - What is it? Ever wished that your ship was tougher? Or that it could jump further? Or fly faster? Engineering is the answer to that wish.
Engineering allows you to change the characteristics of modules you own. The changes stay with the module no matter what ship you put it on. Letting you customize your ships to an enormous extent and make them better for whatever activity you want to perform.
A complete list of the engineers and all their information can be found here - Engineer Highlight.
Table of Contents
- Is it worth it?
- What do I need to know?
- What are materials
- How do I get started?
- Upgrade Time!
- What's Next?
- Suggested Pins
- Material farming
Is it worth it?
Yes, absolutely yes.
There is a lot to learn with engineering, and there are some steps required to get each engineer available to you. However, once you know what you are doing, engineering a ship really doesn’t take that much time and effort, and the improvements are enormous.
For example, imagine you are building a Diamondback Explorer for a long exploration trip. Without engineering, you’ll end up with a jump range of about 36LY. With just one bit of engineering – the Frame Shift Drive, you can get the range of that same build up to over 57LY. That will save you a LOT of time getting where you want to go.
The effect is even greater for combat ships, an un-engineered Imperial Courier built for combat might have a top speed of around 400m/s with a total of about 1200 hit-points (hull and shields combined). Meanwhile a fully engineered one can easily exceed 800m/s with well over 3000 effective hit-points.
Ok, you've convinced me. What do I need to know?
So, the basics.
Currently there are 25 Ship Engineers in the game. Each of these is able to perform engineering on certain different modules and weapons in your ship, and are able to perform these upgrades to different quality levels.
The types of upgrades that can be applied to a given module are referred to as "Blueprints" (for example a lightweight blueprint) and the quality levels are referred to as "Grades".
The highest grade that is available is G5. Each engineer typically only has one or two modules on which they can perform G5 upgrades.
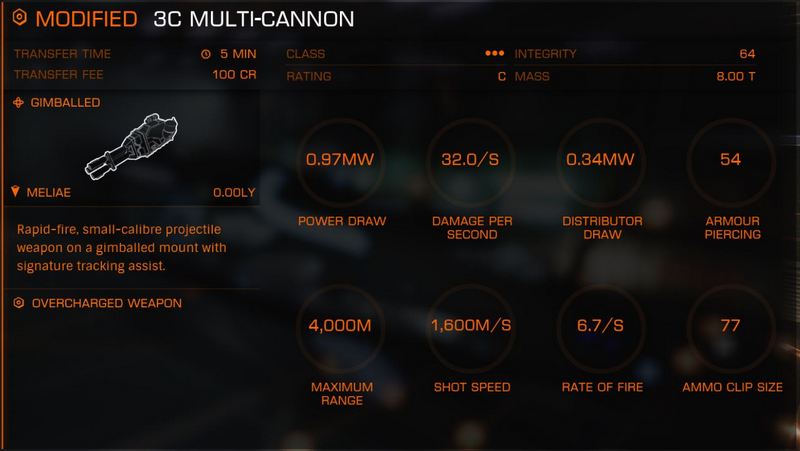
So, for example, you could get yourself a "Grade 3 (or G3) Overcharged Multi-cannon". This would mean you have applied the "Overcharged" blueprint to a Multi-cannon and reached the Grade 3 of that upgrade.
Most modules and weapons in the game have multiple different engineering blueprints available. However, you can only ever apply one to a particular module at a time. If you try to apply a different blueprint to that module, it will overwrite the modification. Each of these blueprints can be further modified by applying Experimental Effects to them.
Experimental effects can make further changes to the characteristics of your module, enhancing the engineering further (ie by further extending the jump range of your FSD), or make more fundamental changes to the module (like changing the damage type of a weapon, or venting heat from your ship). Note that only a single Experimental Effect can be applied to a module at any given time, and not all modules have special effects available.
In order to perform engineering, you are going to need to unlock access to an engineer by meeting certain conditions. Then use "Materials" as a sort of currency to implement the modifications.
Wait, "Materials"? What are they?
Engineering Materials are collectable items that you can use for engineering, synthesis and unlocking certain equipment. They are weightless, take up no cargo space (although you do have a limit to how many of each type you can carry at a time) and are not lost when your ship, SRV or Commander is destroyed. You cannot buy or sell materials, or give them to another CMDR. However, you can trade them at a material trader - we'll get to that in a bit.
If you wish to think of this in the logic of inside the game, you can think of Materials as small samples of each of the different things they represent which are carried around with you in person. If you wish to think of them in more generic terms, think of them as gameplay tokens that you get from performing different activities around the game.
Materials come in 3 Types and 5 Grades. The types of materials are:
Raw: These are raw elements you’ll recognise from the periodic table such as iron, tin and polonium. These are found most regularly in nature from asteroids, plants, and geological sites.
Manufactured: These are pieces of manufactured technology such as biotech conductors, mechanical components and focus crystals. As such these are found commonly in salvage.
Encoded: This is data such as cracked industrial firmware, and datamined wake exceptions, and are gathered from things that you scan like other ships or comms beacons.
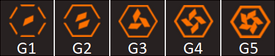
The Grades, as you might expect range from 1 - 5, with G1 being common and the least valuable and G5, the rarest and most valuable. The different material grades are indicated by these symbols.
You cannot buy or sell materials, but you can trade them at a Material Trader. There are 3 different types of traders, one for each type (Raw, Encoded, Manufactured) of material, each material type has multiple categories. Trading between categories comes at a cost of 6->1.
Within a category the exchange ratios are 1->3 if trading to get lower value materials and 6->1 to get more valuable Materials. ie
- If you want to get 1x G2 material, it will cost you 6x G1 material.
- Each G3 material will cost you 6x G2, or 36x G1.
However, if you want to trade a higher value for a lower value.
- 1x G3 will get you 3x G2 or 9x G1


To do these trades, you first select the material that you want to gain, then select what you are willing to trade for it. The ratio will then show you how many you will get and what it will cost you.
So, how do I get started?
Without a doubt, the best engineer to get started with is Felicity Farseer. She is one of the most useful engineers in the game, is quick and easy to unlock and we can get you started at gathering materials at the same time.
I'll warn you now that there is a wall of text to this, but having taken multiple people around this route, I can tell you that in practice, it only takes about 3 hours for most people to complete the whole thing, and most of this time is spent gathering materials that you will need in future. It's broken into convenient legs for players who can only do shorter gaming sessions.
First things first, check you have been invited to see her. To do this, go to your right panel, hit the Engineers button and see what information you have about Felicity Farseer. To be ready for this walkthrough, you should already have the first two boxes ticked in the “Log” section.

Next, get yourself a ship with a good jump range, and the following modules installed:
- Detailed surface scanner
- Cargo rack
- Planetary Vehicle Hangar (and an SRV in the bay)
- Shield
- Fuel Scoop
Something like this will work very well - DBX Bubble Jumper
First Leg
Check your ship has everything it needs (including an SRV in the SRV bay), and sufficient power. Check that you have the discovery scanner set to a fire group as you are going to need that exploration data later (you can also “honk” (use your discovery scanner) in every system you pass through to get more data).
From here on, your best course of action is to operate in "Solo" or "Private" mode so that you aren't competing with other Commanders for materials (only one player can collect the materials in an instance, if someone else is there in Open, then the instance will not reset while either of you is present, so you won't be able to relog to respawn the materials).
Next, if you are a member of the NEWP squadron in game, you are going to want to go to the galaxy map, go to the bookmarks tab, and scroll down to the Squadron bookmarks (they have the squadron symbol beside them). The one you are looking for first is called:
- "2.0: Materials - Dav's Hope" - In case you are not in NEWP squadron the location is:
- System : Hyades Sector DR-V c2-23
- Planet: A5
- Co-ordinates: 44.8180, -31.3893
Plot yourself a route there, and remember to honk each system on route.
Once you arrive at the destination, you will see that it is a planet, so it's time to put that Detailed Surface Scanner to work. Once you have scanned the planet to 100% you should see “Dav's Hope“ in your Navigation tab on the left panel. Head down there, land, and hop out in your SRV.
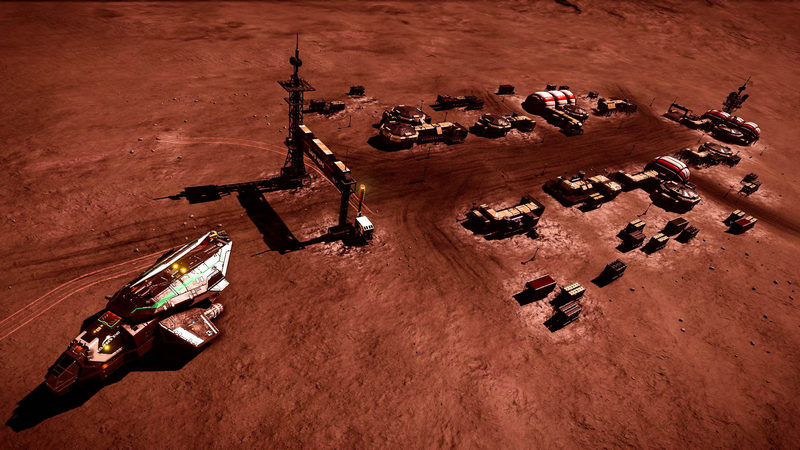
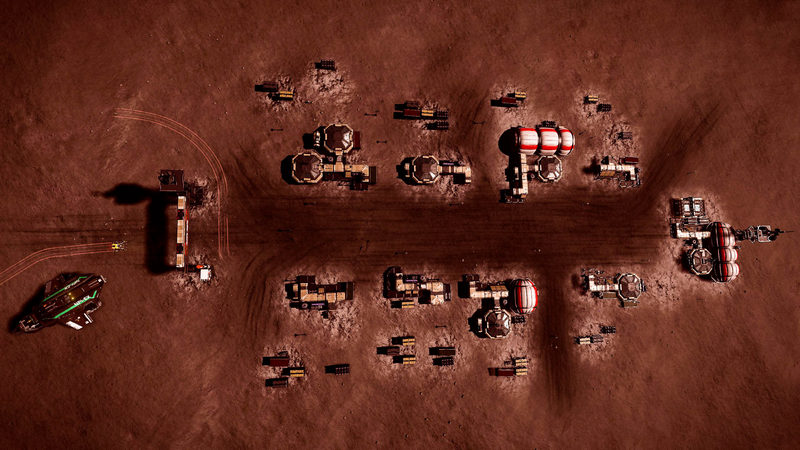
Dav's Hope is an abandoned mining colony. It is a very useful location for gathering the "Manufactured" type of engineering materials. In order to do this, you drive around the site in your SRV, with your cargo scoop open, targeting, and driving over the materials which spawn. There is an easy track to follow around the outside of the site on which these materials appear.
As soon as you have completed a circuit, Menu Log (that is, exit to the main menu) and log back into Solo or Private mode again. Hey Presto, the materials will have re-appeared. So, drive around the circuit again.
I would recommend doing at least 5 circuits at this point as it will give you a very good starting point to get into early engineering activities with. Don't go nuts, you can always come back.
Second Leg
Head to the Galaxy Map and again look at the bookmarks tab. You should find your next destination:
- "2.1: Materials - Bug Killer - HIP 16613" - Which will direct you to:
- System: HIP 16613
- Planet: 1A
- Co-ordinates: -11.0093, -96.0339
Plot a course and start jumping, scanning as you go. Once you arrive in system, head to the target planet and perform a detailed surface scan on the planet using your probes. You should get a surface point of interest marker called "The Bug Killer".
WARNING - If you find yourself with a... visitor... at this location. Don't get too close, and don't take any aggressive actions. If you do, you will get dead very quickly. Otherwise, just enjoy the light show, and carry on with your business here.
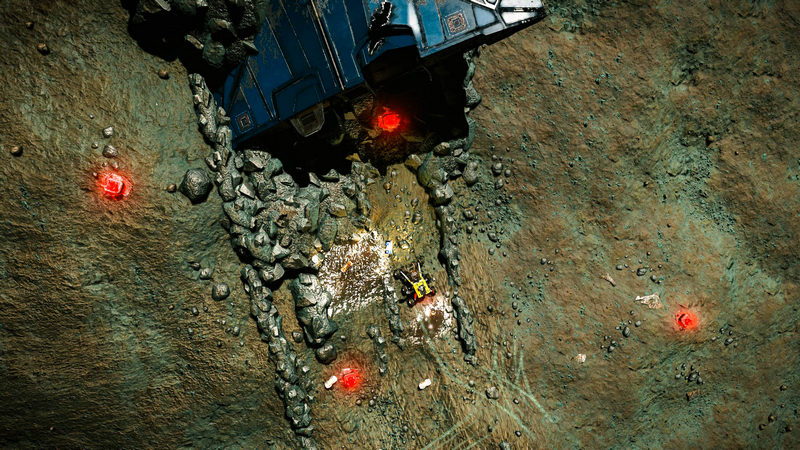
Follow the nav marker all the way down to the surface, you should find a crashed ship there. Find yourself somewhere to land. Now, deploy your SRV, scan the ships computer marker - located in the ship itself (you only have to do this once) then head around the back to where all the cargo and stuff is.
Around this area, you will find 3x "Cargo Rack" and 3x "Comms Beacon". You will need to shoot each of the cargo racks until it pops and a material comes flying out (drop you cargo scoop, target the material and drive over it) and scan the comms beacons (use your turret to target it, and hold down the datalink scanner fire button). Once you have done all 3 of each type, exit and re-launch the game.
Each time you do one of these you will get 3x high value (G4 or G5) Materials. the cargo racks are dropping "Raw Materials" while the comms beacons are dropping "Data Materials". So, each time you exit and re-launch, you'll be getting 9x Raw Materials, and 9x Data Materials.
I'd highly recommend you repeat this activity 5-10 times, as this is a very efficient way to collect these materials in the game.
Before you head off, make sure you find the SRV which the pilot of the BugKiller attempted to flee in, just to get the last piece of the story.
Third Leg
A short run now to go grab the meta-alloy that Farseer wants. There are two different ways to do this.
The first and easiest, is simply to go to the Maia system, visit the planetary base "Darnielle's Progress" and buy yourself a meta-alloy from the Commodities Market.
The second and more interesting (and free) method is to head to the nearby system "Delphi" and fly out to planet 5A. This is marked in the Squadron Bookmarks as: 3.0: Thargoid Structure - Delphi
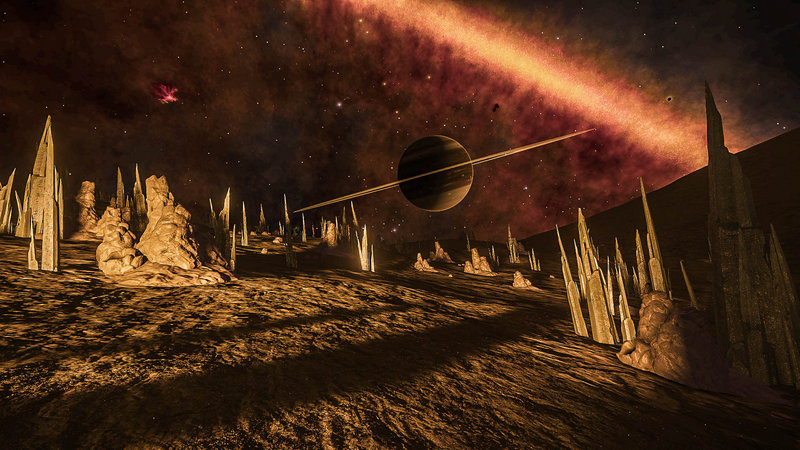
As before, perform a detailed surface scan. This will reveal an "Unknown Structure Scan" on your navigation panel. Head down and land yourself somewhere safe near the central structure. Go out in the SRV again and take a drive around this incredible structure (which is actually host to a secret underground room and a map, but you aren't quite ready for that yet).
For now, you are looking to find yourself some Organic Structures. You'll find these scattered around the central structure. Some of these will have something on them that looks a little like a round, green fruit. Shoot this off, and collect the thing that flies off, it will show up on your contacts panel as a "Mining Fragment". That is a Meta-Alloy. Scoop it up and return it to your ship.
Final Leg
Now, before we set off, there are a couple things to cover. Firstly, be aware that Deciat is a common hunting ground for gankers. If you don't believe that you will survive against a gank attempt, you may want to consider staying in solo, or get yourself an escort. Of course, in the long run I would recommend a gank survival training course. You can ask on our discord if you’d like one.
Secondly, we'd best check that you have enough Materials to do some engineering. Go to your right panel, along to "Inventory" and down to the materials tabs. Check that you have at least: 11x Atypical Disrupted Wake Echoes 8x Chemical Processors
And ideally also: 5x Phosphorus 5x Strange Wake Solutions
If not, we are going to need to get you to a Material Trader before you head to Farseer. The most convenient locations to get each of these are as follows:
- Atypical Disrupted Wake Echoes / Strange Wake Solutions - Tesla Dock in the GANDZA system
- Chemical Processors - Chandler Ring in KARKA
- Phosphorus - Zahn Enterprise in CENNICENINO
If you are missing something, set your course for one of the above systems, and remember to try to keep your trades within the same category (the horizontal sets) as you get the best exchange rates that way.
If you don't need anything, plot your route to Deciat.
Time to hit the road, REMEMBER TO HONK.
Once you are safely on the ground at Farseer Inc (which is on Deciat 6a), hand in the meta-alloy. BOOM. You have unlocked your first engineer. The first order of business now is to improve your reputation with her. This is where all that exploration data comes in very handy. Click on "Universal Cartographics" and sell her all the exploration data you can.
Now, you should be able to upgrade that Frame Shift Drive to at least G2 Increased Range and potentially even further.
Upgrade Time!
Click on the engineers workshop, and select your Frame Shift Drive from the list of available equipment. You should now be looking at a screen something like this. Select the Increased FSD Range modification. Only the first grade will be coloured orange at this point, indicating it is available, however as you start to apply this modification, you will notice your Access Level (shown in the top left) increasing. You should find that your access level increases to Grade 2 around the same time that you complete the Grade 1 upgrade. Note that you don’t have to go all the way - if you’ve taken a G1 upgrade far enough to unlock the G2 upgrade, you might as well start on G2. There is no benefit in fully completing G1. As you can see from this screenshot, I have not completed G3, but G4 is available, so I will move onto G4.

Don’t forget to apply the experimental effect to your modification. It does not matter which Grade of modification you have selected when you apply this. If you have a G5 modification, you can select the G1 and apply the experimental. This means that an engineer who offers G1 modifications on a module can apply experimental effects on that module, even if you have engineered it beyond G1.
Some useful things to note while you’re here:
- Improving your reputation with an engineer not only unlocks higher level upgrades, it also makes the lower levels easier. The first time you do a G1 upgrade it might take 4-5 upgrades to reach G2. By the time you’ve maxed out your reputation to G5, a single upgrade will complete G1.
- You can “pin” a blueprint from an engineer to allow you to apply that upgrade from any station using “Remote Engineering”. Note that your reputation with an engineer only improves from upgrades you do at their base, so get yourself to G5 access before doing remote engineering.
What's Next?
So, you've followed the guide above and got yourself access to Felicity Farseer, and hopefully been able to perform some engineering to get your jump range up and improve your ship. Now you've got the bug, and want to go further, a lot further, and really start optimising your ships for different roles.
Well, there are a total of 25 engineers available that can improve your ship, each with their own requirements to gain access to them. Most you will only hear about by gaining the trust of another engineer, this will happen when your reputation with them improves to about half way through grade 3.
Here is a rundown of the engineers that are relatively straightforward to unlock and between them give you the ability to engineer most of the key modules on your ships and suggestions of what to pin at each.
Tod "The Blaster" McQuinn
- Location: Wolf 397
- Pin: Multi-Cannon - Overcharged
- Unlocking: Kill at least 15 Wanted ships, and bring him 100,000cr of Alliance Bounty Vouchers. Bring more if you can as selling these will improve your reputation with him.
- Notes: N/A
The Dweller
- Location: Wyrd
- Pin: Power Distributor - Charge Enhanced
- Unlocking: Sell goods at 5 different black markets. The easiest way to do this is by accepting a delivery mission, and abandoning it leaving you with stolen goods in your ship. Then bounce around black markets selling one at each. Be warned, you will need to get good at entering stations without getting scanned. Any remaining stolen goods can then be sold at his station to improve your reputation.
- Notes: G3 engineering for laser weapons is also available here. Combined with Tod, you now have most basic weapons upgraded.
Lei Cheung
- Location: Laksak
- Pin: Shield Generator - Reinforced
- Unlocking: G3.5 reputation with The Dweller and Trade at 50 different commodity markets - the easiest way to get this guy unlocked is just to remember to buy a commodity from every station you dock at, and sell it at the next one. Then you'll need to give him 200t of gold, you can just buy this, so just find a convenient source on EDDB or Inara.
- Notes: You can also get your shield boosters engineered here to G3. Particularly for a resistance build, this makes a world of difference.
Selene Jean
- Location: Kuk
- Pin: Hull Reinforcements - Heavy Duty
- Unlocking: G3.5 access with Blaster and mine 500t.
- Provide 10t of Painite, easiest way to get this is to buy it from a fleet carrier.
- Notes: - Selene is a bit of a specialist, one of only two engineers in the bubble who can do anything to your hull or reinforcements, so you'll likely end up driving to see Selene for every ship you engineer in order to get the experimental effects applied.
Once you have access to all the above, you will have the ability to engineer all the key systems, including FSD, thrusters, shields, armour, most weapons, and some utilities. By this stage you should be seeing some incredible improvements to your ship performance, no matter what types of ships you are building.
A complete list of the engineers and all their information can be found here - Engineer Highlight
Suggested Pins
Without Colonia Engineers
| Engineer | Module | Blueprint |
|---|---|---|
| Bill Turner | Plasma Accelerator | Efficient/Focused/Long Range |
| Broo Tarquin | Beam Lasers | Efficient |
| Chloe Sedesi | Thrusters | Clean Drive |
| Colonel Bris Dekker | Frame Shift Drive InterDictor | Longer Range |
| Didi Vatermann | Shield Booster | Heavy Duty |
| Elvira Martuuk | FSD | Increased Range |
| Etienne Dorn | Life Support | Lightweight |
| Felicity Farseer | ||
| Hera Tani | Power Plant | Overcharged |
| Juri Ishmaak | Detailed Surface Scanner | Expanded Probe Radius |
| Lei Cheung | Shield Generator | Thermal Resistant |
| Liz Ryder | Seeker Missle | High Capacity |
| Lori Jameson | Sensors | Lightweight |
| Marco Qwent | Power Plant | Low Emissions |
| Marsha Hicks | Multi-Cannon | Any |
| Mel Brandon | Shield Cell Banks | Specialized |
| Petra Olmanova | ||
| Professor Palin | Thrusters | Dirty Drive |
| Ram Tah | Heatsink | Ammo |
| Selene Jean | Armor | Heavy Duty |
| The Dweller | Power Distributor | Charge Enhanced |
| The Sarge | Collector Limpet | Lightweight |
| Tiana Fortune | Any | Any |
| Tod "The Blaster" McQuinn | Multi-Cannon | Overcharged |
| Zacariah Nemo | Fragment Cannon | Any |
All Unlocked
| Engineer | Module | Blueprint |
|---|---|---|
| Bill Turner | Plasma Accelerator | Efficient/Focused/Long Range |
| Broo Tarquin | Beam Lasers | Efficient |
| Chloe Sedesi | Thrusters | Clean Drive |
| Colonel Bris Dekker | Frame Shift Drive InterDictor | Longer Range |
| Didi Vatermann | Shield Booster | Heavy Duty |
| Elvira Martuuk | FSD | Increased Range |
| Etienne Dorn | Life Support | Lightweight |
| Felicity Farseer | ||
| Hera Tani | Power Plant | Overcharged |
| Juri Ishmaak | Detailed Surface Scanner | Expanded Probe Radius |
| Lei Cheung | Shield Generator | Thermal Resistant |
| Liz Ryder | Seeker Missle | High Capacity |
| Lori Jameson | Sensors | Lightweight |
| Marco Qwent | Power Plant | Low Emissions |
| Marsha Hicks | Multi-Cannon | Any |
| Mel Brandon | Shield Cell Banks | Specialized |
| Petra Olmanova | ||
| Professor Palin | Thrusters | Dirty Drive |
| Ram Tah | Heatsink | Ammo |
| Selene Jean | Armor | Heavy Duty |
| The Dweller | Power Distributor | Charge Enhanced |
| The Sarge | Collector Limpet | Lightweight |
| Tiana Fortune | Any | Any |
| Tod "The Blaster" McQuinn | Multi-Cannon | Overcharged |
| Zacariah Nemo | Fragment Cannon | Any |
Material Farming
So, all that stuff is all very well, but unless you can get hold of the required materials, you won’t be engineering anything much. So, here is a rundown of the quickest ways to gather high grade materials. You can then visit a Material Trader (see above) to trade these down to fill up on anything else you need.
Here is a rundown of the quickest ways to gather high grade materials. Then you can visit a Material Trader (see above) to trade these down to fill up on anything else you need.
One technique that you will need to use for many of these is "Menu Logging". This is just the system of performing an activity, then exiting to return to the main menu, before loading back into the game again to reset the instance and performing the activity again.
Encoded Materials
Most data comes from scanning stuff, either ships, communications beacons on planets, wakes from other ships etc. Most of these are fine if you are just gathering as you go, but they are also very slow.
The best location in the game for gathering Encoded Materials quickly is Jameson’s crash site:
- Jameson's Crash Site
- Squadron Bookmark: "2.2: Materials – Jameson’s Crash Site"
- System: HIP 12099
- Planet: 1B
- Co-ords: -54.3803, -50.3575
This is a great site which is closely tied into the history of the Elite lore. Here there are 4 comms beacons each containing parts of the audio log from CMDR Jameson on his final mission. These comms beacons also drop Encoded materials.
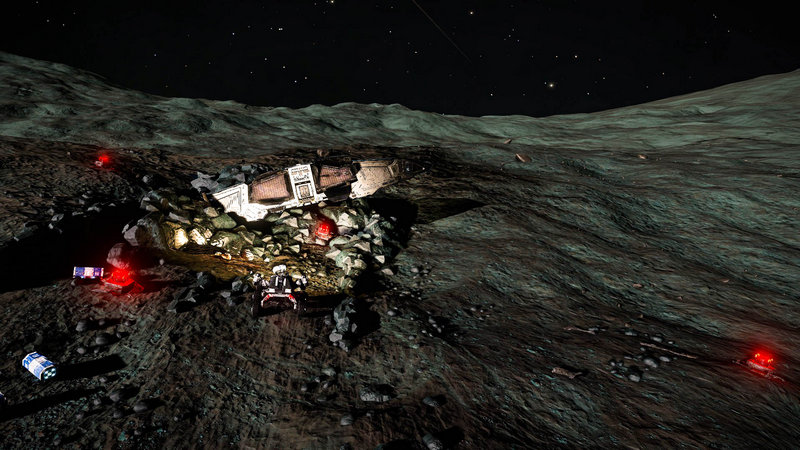
Position yourself behind the cobra, where you can scan all the beacons by swinging your SRV turret all the way around, and put the handbrake on. You can also (if you're interested) listen to history while you scan the beacons again and again, Menu Logging to reset the instance.
Missions - The main exception to the above is for Modified Embedded Firmware (MEF), which are typically acquired as one of the reward options from missions. It is also possible to acquire Modified Consumer Firmware, Security Firmware Patch and others from missions as well. However, MEFs are the most valuable available through missions, and are arguably quicker to get through this means than by farming Jameson’s crash site.
Raw Materials
Raw materials are typically acquired by mining asteroids or prospecting the surfaces of planets. However, there are some ways to make this a lot more efficient.
Surface Sites
There are now Geological and Biological surface sites on planets which reliably drop a specific set of Raw Materials. Geological sites are more common, and have a lower drop rate and more variation. Biological Sites are much rarer, and have less variety but have VASTLY higher drop rates for certain materials.
Warning: Some of these sites have HIGH GRAVITY, so approach the sites with care and always check the gravity reading. I would also strongly recommend taking nothing bigger than a medium ship, and take two SRVs as the some of the locations are rough.
If you are member of NEWP, check Squadron Bookmarks, you will see the following items listed which are Geological sites in the bubble. Note these are reasonably efficient if you only need a few, if you need a lot, use the biological sites and trade across.
| Bookmark | Material | System | Body |
|---|---|---|---|
| 2.3 | Selenium | LHS 417 | 9 E A |
| 2.4 | Niobium | HR 7221 | 3 |
And the following sites which are Biological sites, about 1500Ly outside the bubble.
| Bookmark | Material | System | Body | Suggested Site | Body Distance |
|---|---|---|---|---|---|
| 2.50 | Polonium | HIP 36601 | C 1 A | Biological 6 | ~150,000Ls |
| 2.51 | Ruthenium | HIP 36601 | C 1 D | Biological 5 | ~150,000Ls |
| 2.52 | Tellurium | HIP 36601 | C 3 B | Biological 2 | ~150,000Ls |
| 2.53 | Technetium | HIP 36601 | C 5 A | Biological 2 | ~150,000Ls |
| 2.54 | Antimony | Outotz LS-K D8-3 | B 5 C | Biological 3 | ~310,000Ls |
| 2.55 | Yttrium | Outotz LS-K D8-3 | B 5 A | Biological 19 | ~310,000Ls |
And remember you can always suicide your way back home from out here.
Manufactured Materials
Manufactured materials are things that have been produced by humans. As such they are typically dropped by ships, given as rewards from missions, or found at certain surface sites. As above, this guide will tell you how to find the highest-grade materials so that you can trade these down efficiently, but with a few special mentions for other methods which reward well.
High Grade Emissions
The High Grade Emissions (HGE) Unidentified Signal Sources (USS) make up the best route to get G5 manufactured materials. The following is a brief guide on how to farm these efficiently.
Firstly, you’ll need to set up a suitable ship. You’ll need a ship with a decent jump range, high turn rate in supercruise, cargo space, and collector limpet controllers. An AspX makes a great choice for this.
Next, you’ll need to identify where to go to maximise your chances of finding what you seek. You want a high population system (this increases the spawn rate for HGEs) with the correct system state for the material you’re after. You can use EDDB.io or EDSM.net to search for systems with the required allegiance and state. Here is a lookup table showing where to look:
| Material | State | Allegiance | Quick Link |
|---|---|---|---|
| Imperial Shielding | None / Election* | Empire | EDDB.io |
| Core Dynamics Composites | None / Election* | Federation | |
| Proprietary Composites** | None / Election* | Federation | |
| Proto Heat Radiators | Boom | Independent / Alliance | |
| Proto Radiolic Alloys | Boom | Independent / Alliance | |
| Proto Light Alloys*** | Boom | Independent / Alliance | |
| Improvised Components | Civil Unrest | Independent / Alliance | |
| Pharmaceutical Isolators | Outbreak | Independent / Alliance | |
| Military Grade Alloys | War / Civil War | Independent / Alliance | |
| Military Supercapacitors | War / Civil War | Independent / Alliance |
- * or any state that isn't listed elsewhere on the table.
- ** G4 material that spawns alongside Core Dynamics Composites.
- *** G4 material that spawns alongside Proto Radiolic Alloys.
- These states and allegiances give the best chances for the listed material to drop but does not guarantee it.
- The most efficent way of getting Improvised Components, Pharmaceutical Isolators, and Military Supercapacitors is farming any other G4/5 material and trading for these.
Once you arrive in a suitable system, drop in on the Nav beacon and scan it. Then, return to supercruise and check through your nav panel to see ALL the USSs in the system. If there are no HGE signal sources, simply move on and try a different system. If there are one or more HGEs, then head to each checking for suitable materials.
Note that if you find a HGE with a good amount of time on it, it is possible to farm the same site repeatedly. To do this, once you have collected all the materials, exit to desktop, log back into the same game mode, then go into supercruise and set your throttle to zero. You’ll find the same HGE right behind you, which you can turn around and visit again. Rinse and repeat until you are full. Alternate means of collecting manufactured materials are as follows:
Combat
NPCs always drop some materials when they are destroyed, and what they drop depends on what type of ship they are flying. More powerful and higher-level NPCs typically drop higher grade materials. Conflict zones and pirates are a good way to get large quantities of G1-4 materials for 8 out of the 10 different material groups.
Missions
Mission rewards sometimes allow you to get either Biotech Conductors, or Exquisite Focus Crystals. The best chance of getting these is from mission rewards in systems which are in a Boom state. Often the easiest way to get these is to perform passenger missions. Robigo is an old favourite for getting these.
Murder NPC transport and mining ships drop manufactured materials along the "Heat" (ie Heat Vanes) and "Mechanical Components" (ie Configurable Components). The best way to do this is as follows:
Find a system in the “famine” state, ideally an anarchy system (as this avoids legal trouble), though this is not always possible. Visit the one with the highest population, scan the nav beacon and hop back into supercruise, look on the navigation panel to see if there is a “Distribution Centre”. If there isn’t, try a different system.
If there is a Distribution Centre, go there. You’ll find 3x T9s parked up dishing out food to the starving. A noble endeavour. However, T9s also drop a wide range of valuable materials. Deploy hardpoints and kill them.
Collect, relog, rinse and repeat.